

Summary
Create and manage your own project status

Johannes Baur
Published on
4.6.2022
5 Minuten

Table of contents
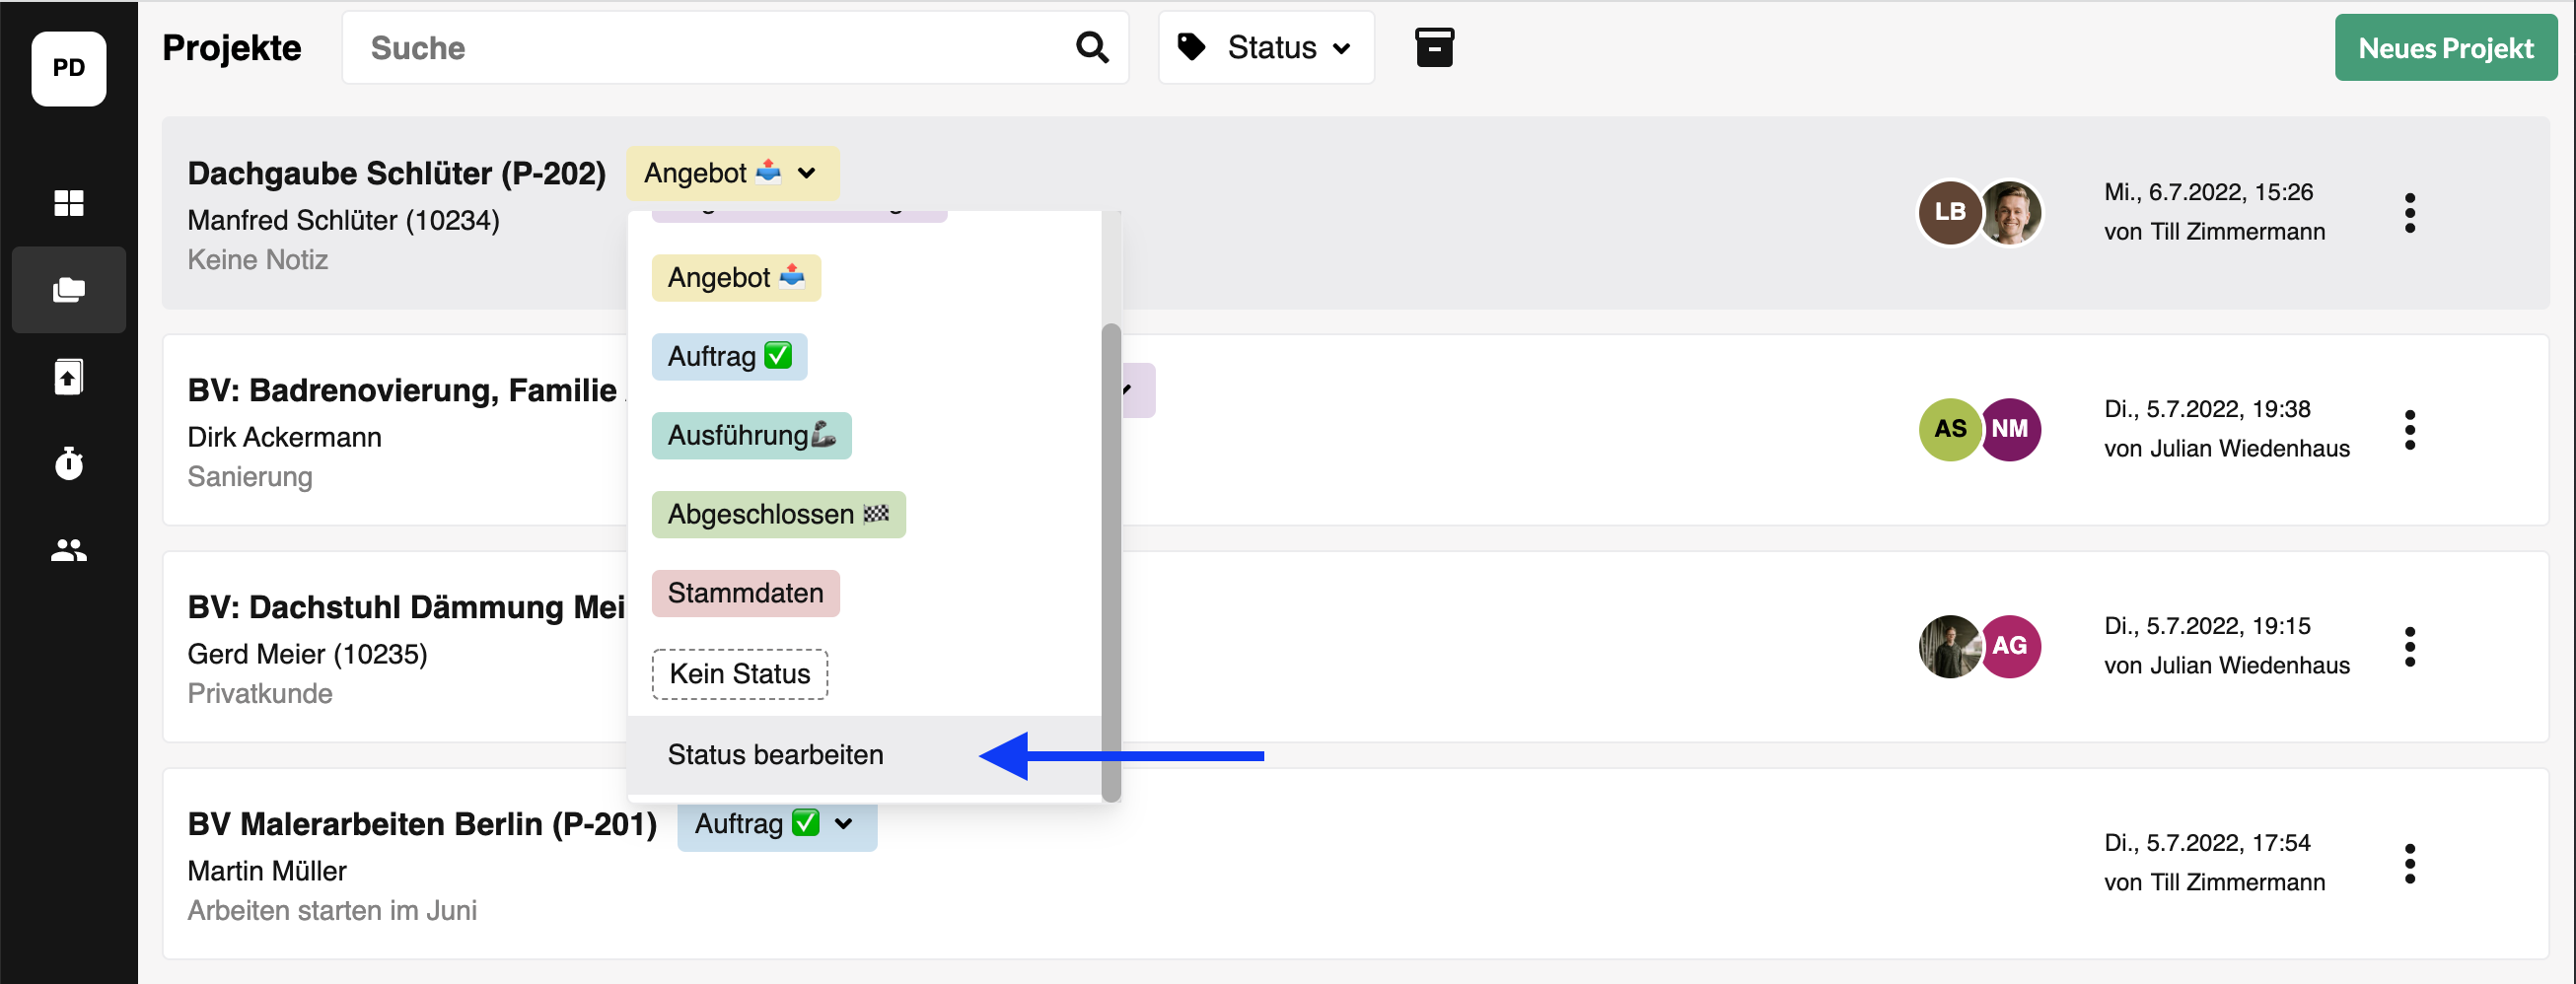
You've recently been able to assign a status to your projects in Plancraft. To make your work as easy as possible, we have already created a number of statuses for you. Of course, you can edit them. Or you can create completely new ones. We'll show you how it works!
Here's how it works:
1. Click “Edit Status”
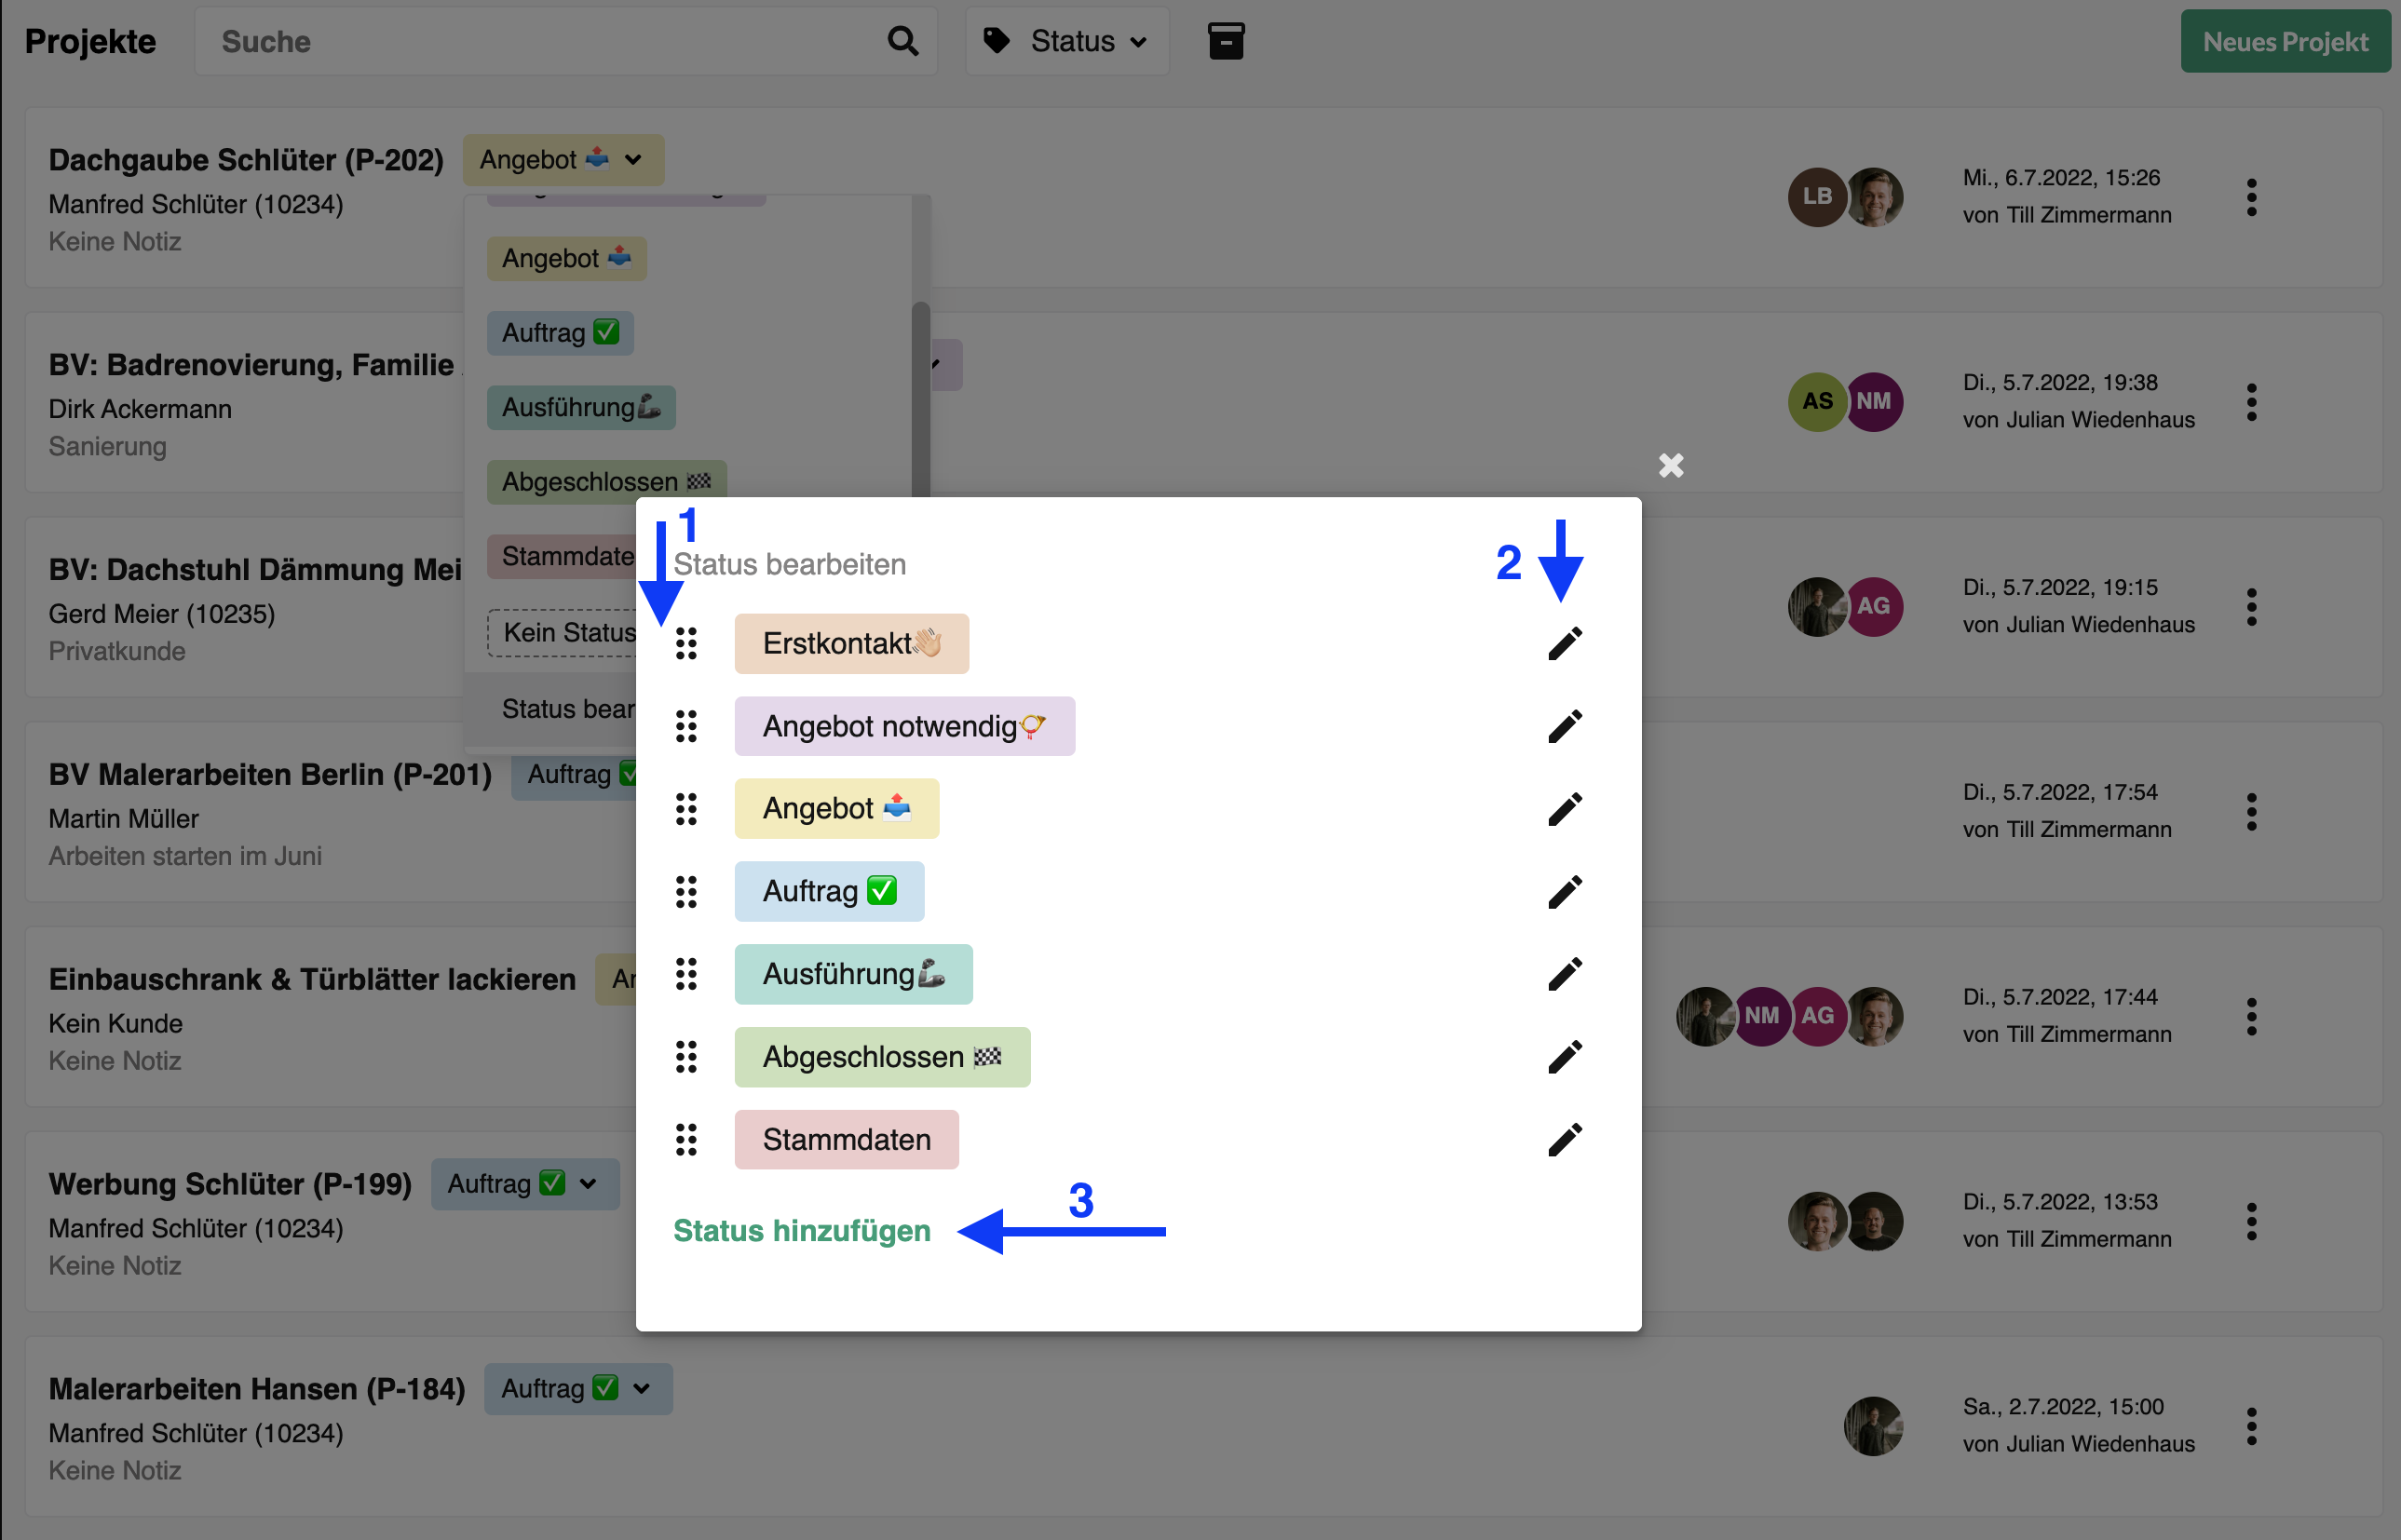
2. Rename, rebuild, change order & more
A window opens that offers you the following functions:
- Change order via drag & drop
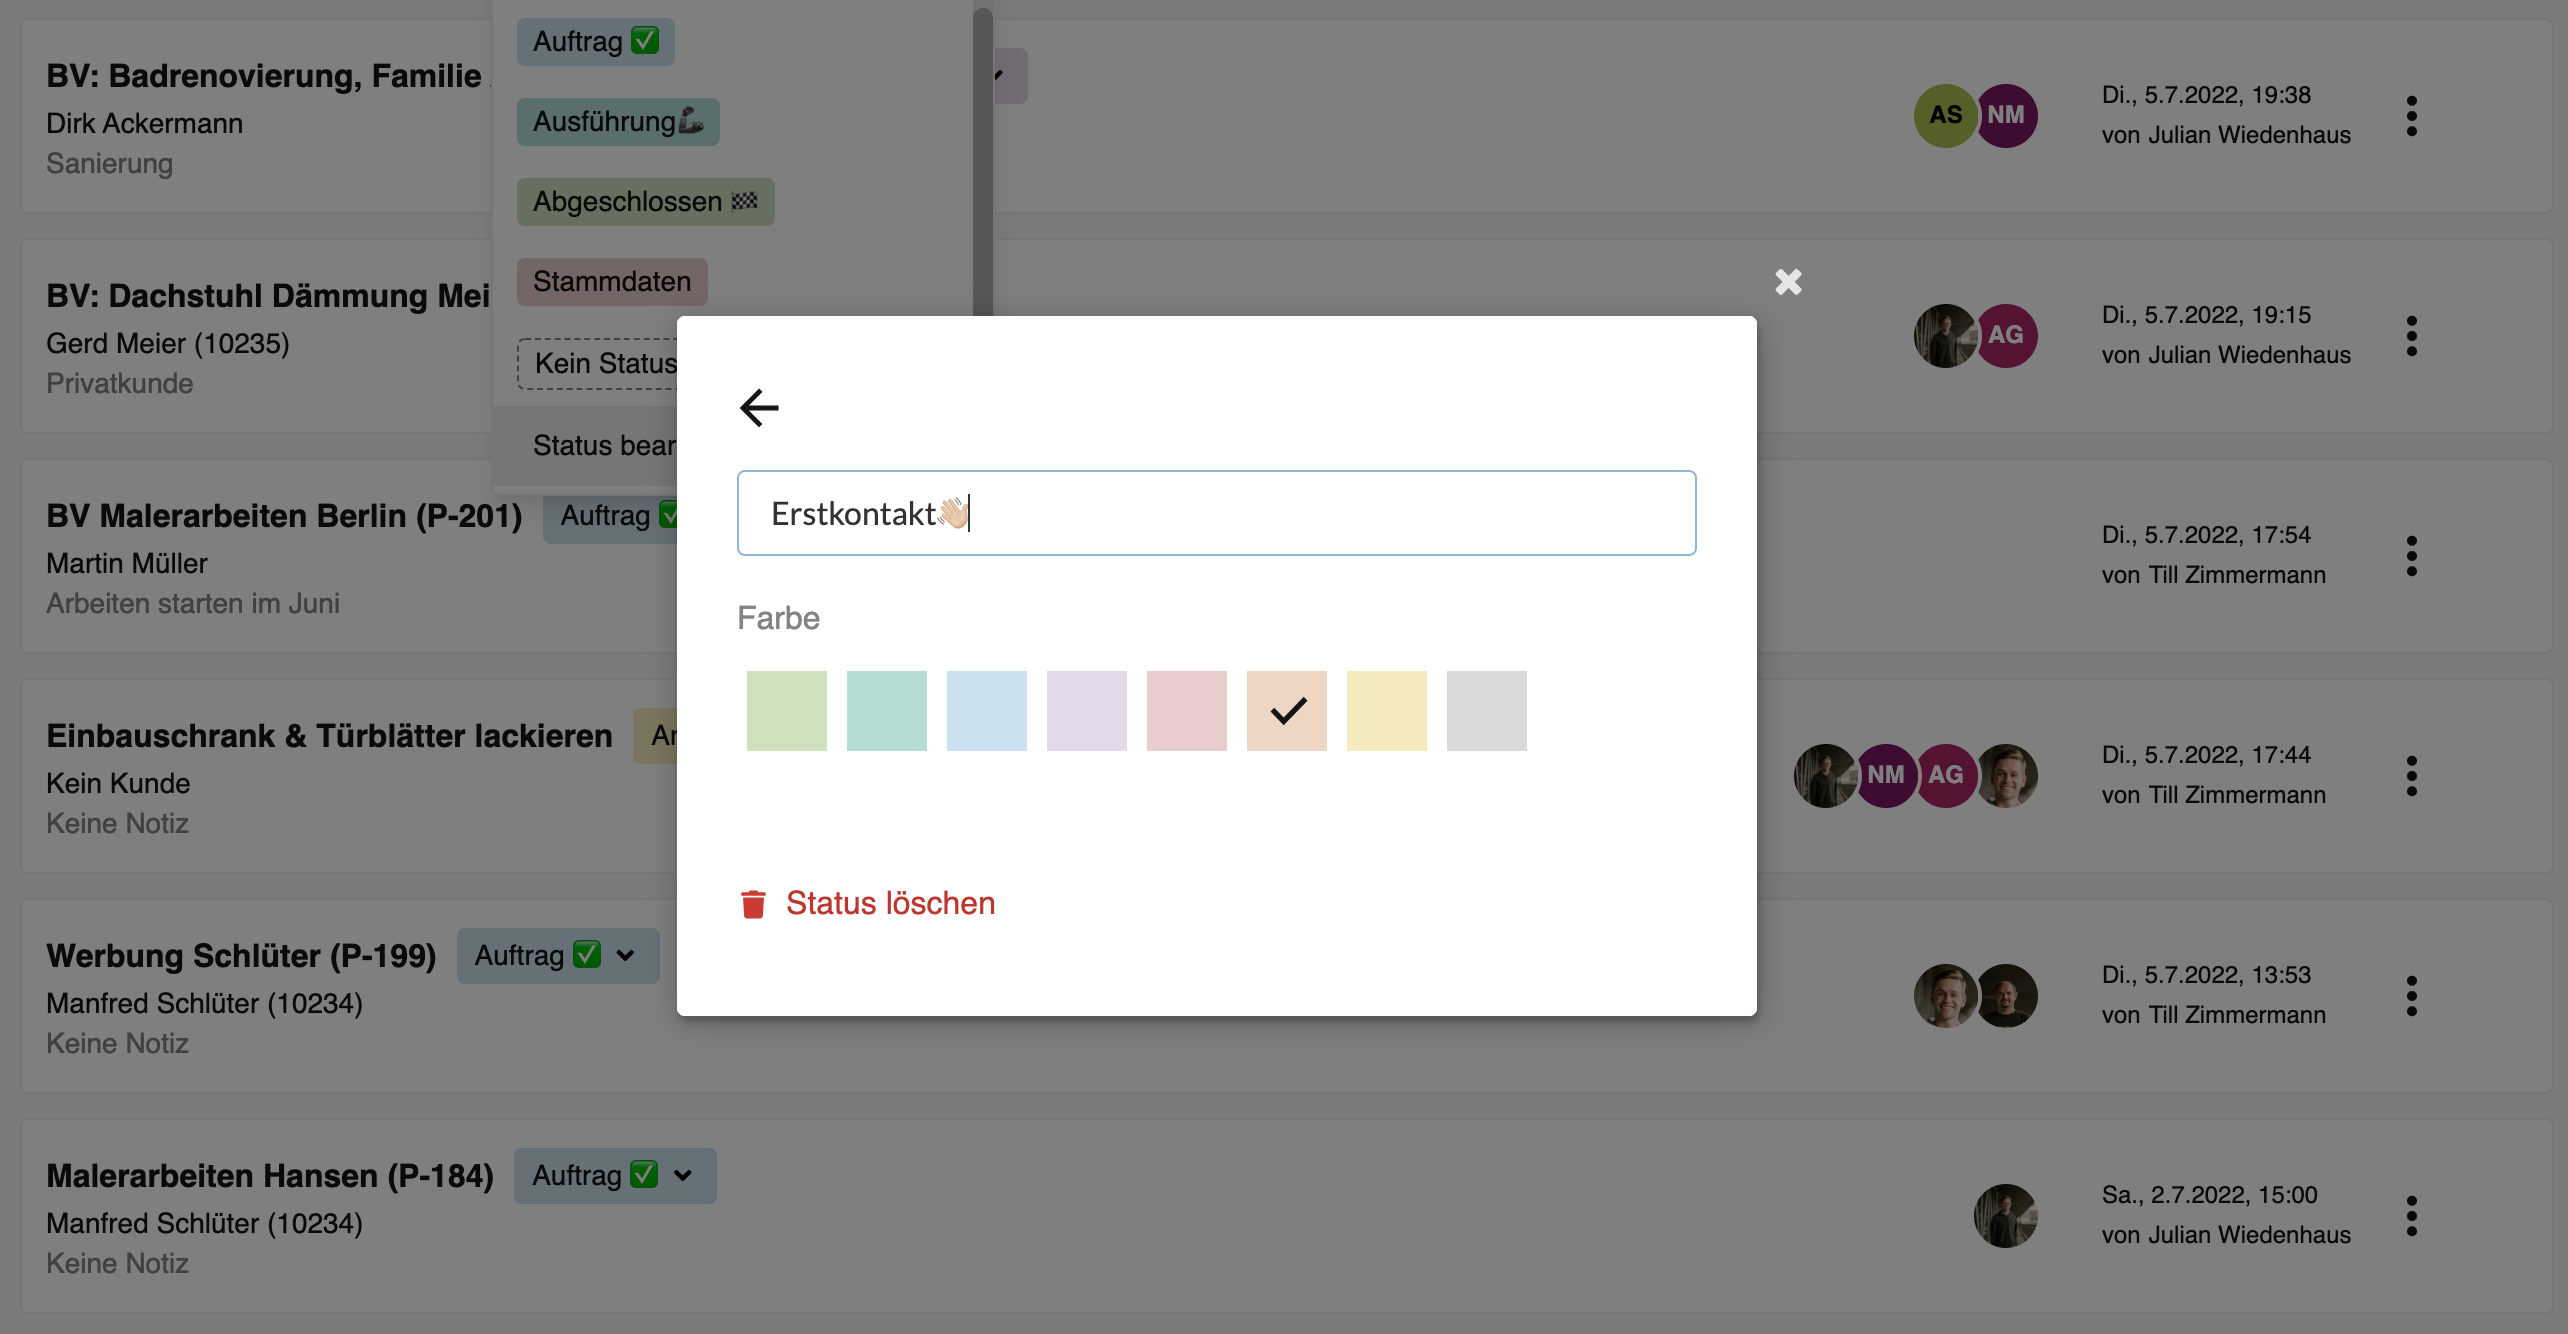
- Rename, delete, change color
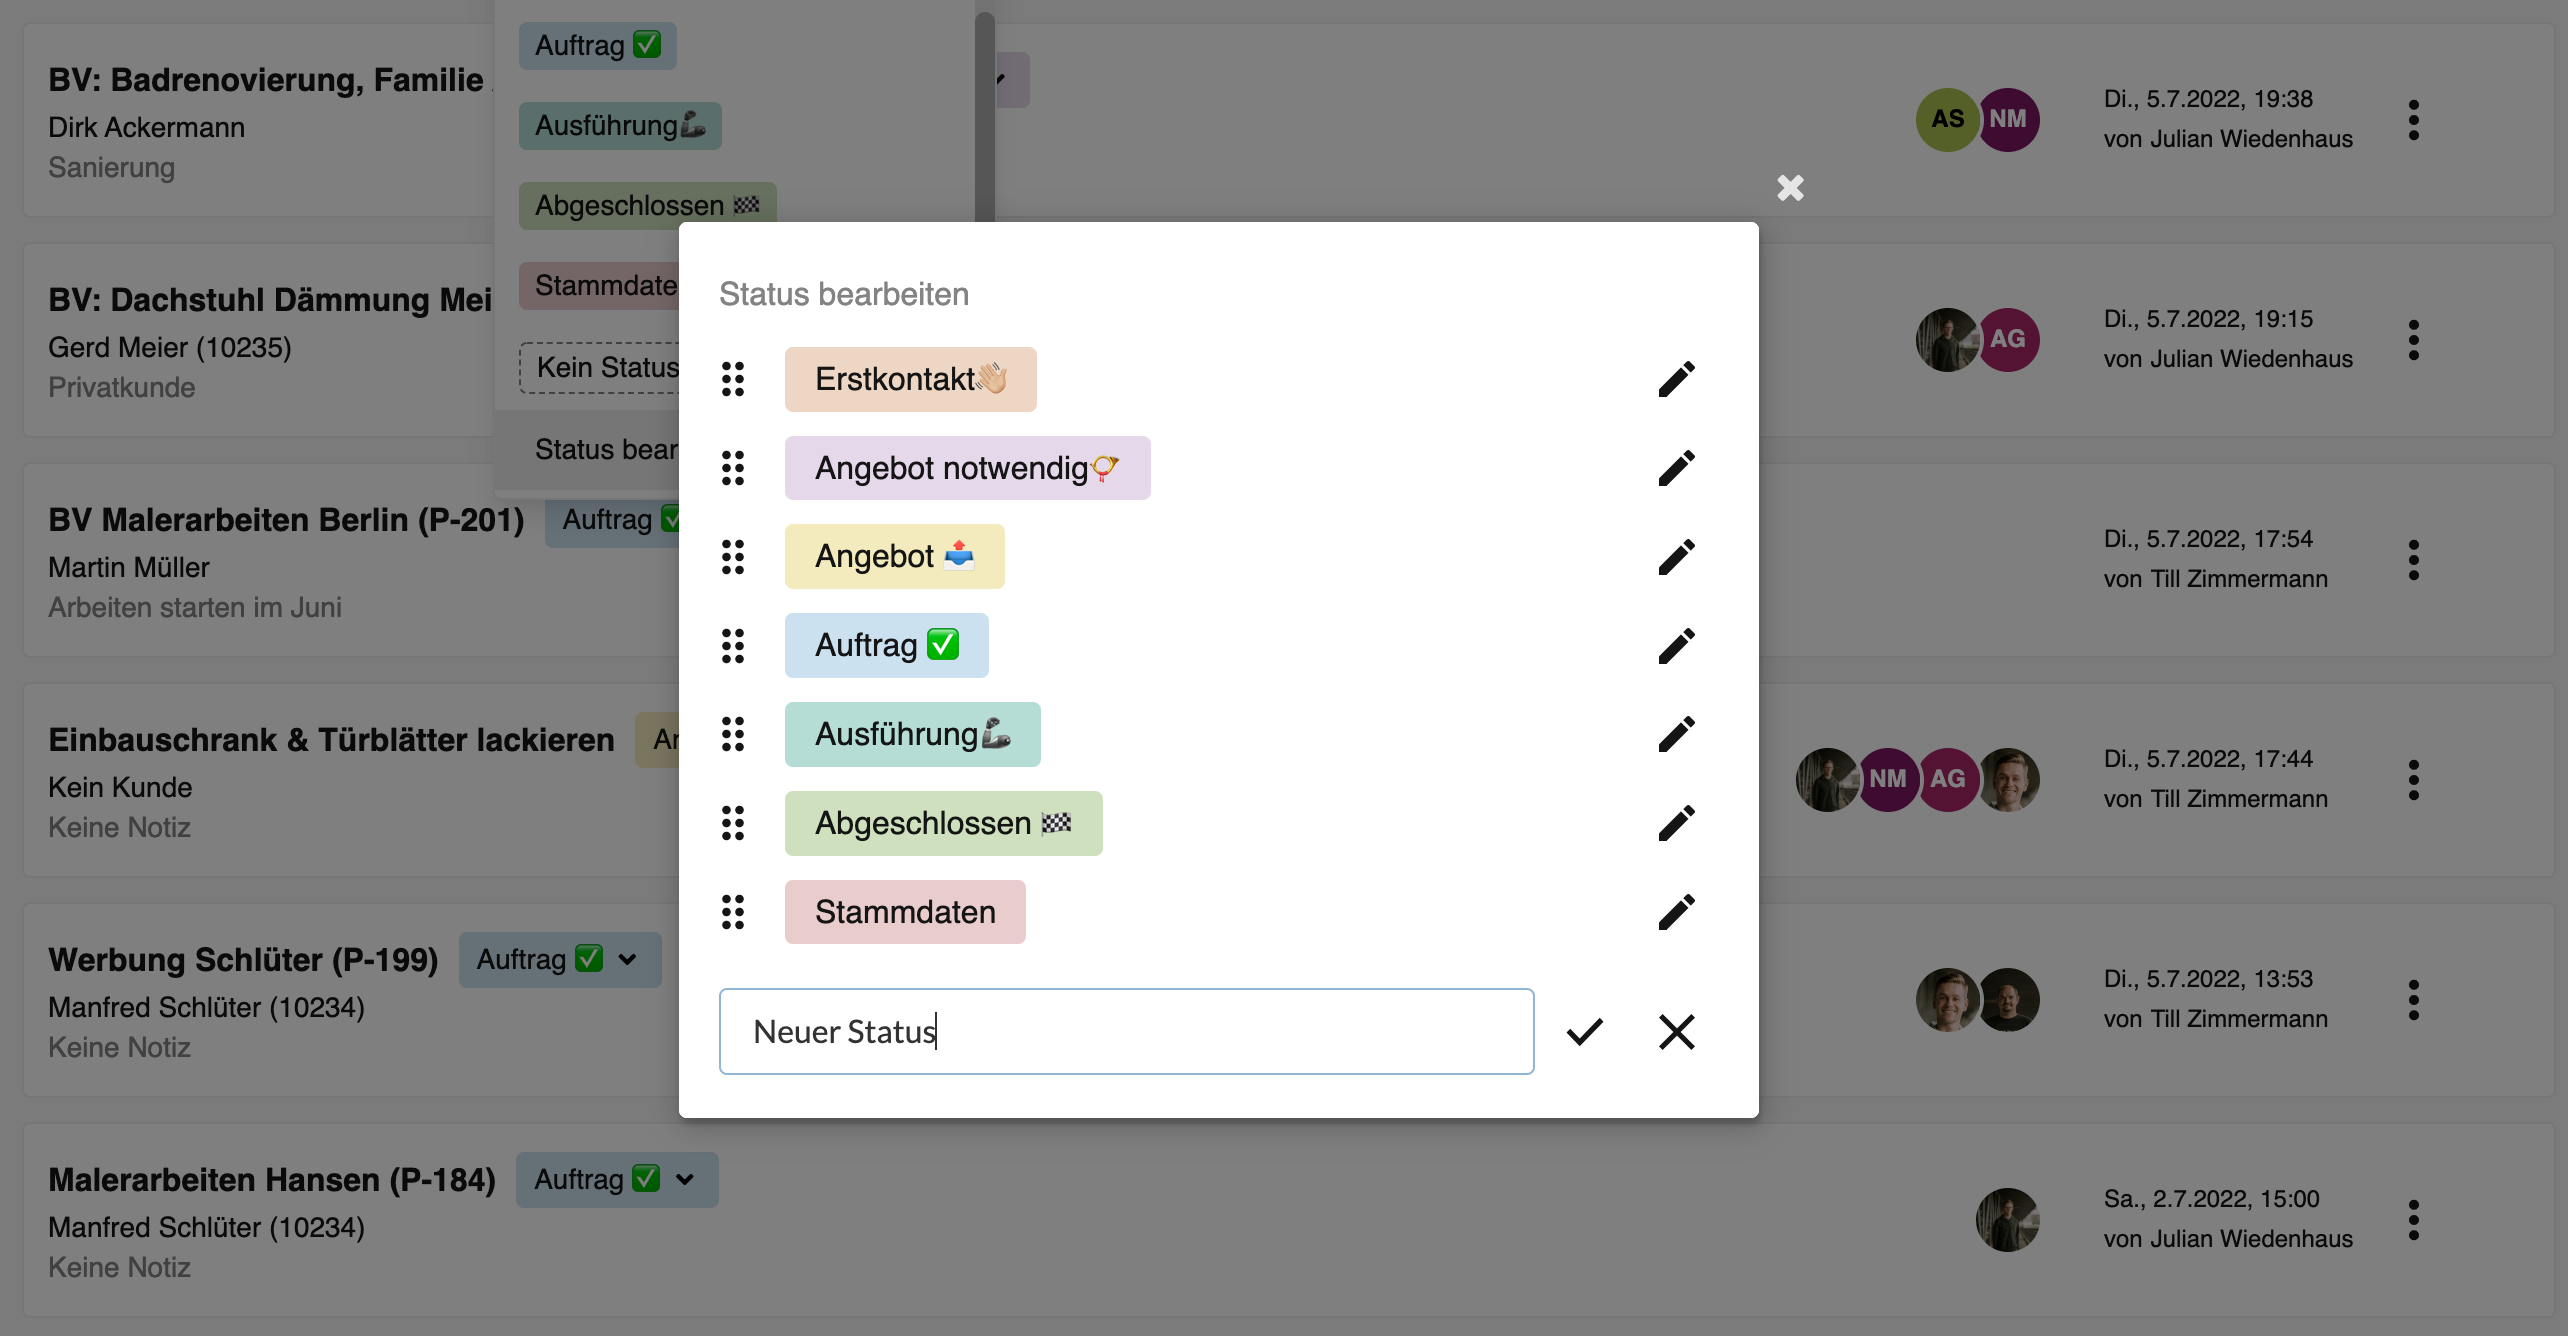
- New status
“New status” example
Rename, delete, and change color
____________________________
Have fun trying it out! Do you have any questions or suggestions? Feel free to write to us at:
support@plancraft.com
Author
As a product manager and UX designer, Johannes has a deep understanding of the needs of craftsmen. He conducts numerous interviews with plancraft customers to drive continuous product improvements. Johannes regularly shares tips and application notes that support plancraft users in their daily work.
More blog articles


Create an account now and start testing!
The trial is completely free and without obligation. Alternatively, you can book a demo session and have a Plancraft team member guide you through the software.


